Step 1
Open the ‘Brand’ section in Settings.
Click the gear icon at the top right. Settings opens.
In the list on the left, under ‘Company’, click ‘Brand’. Only people with the ‘Brand and templates’ permission see this section.
What you should see
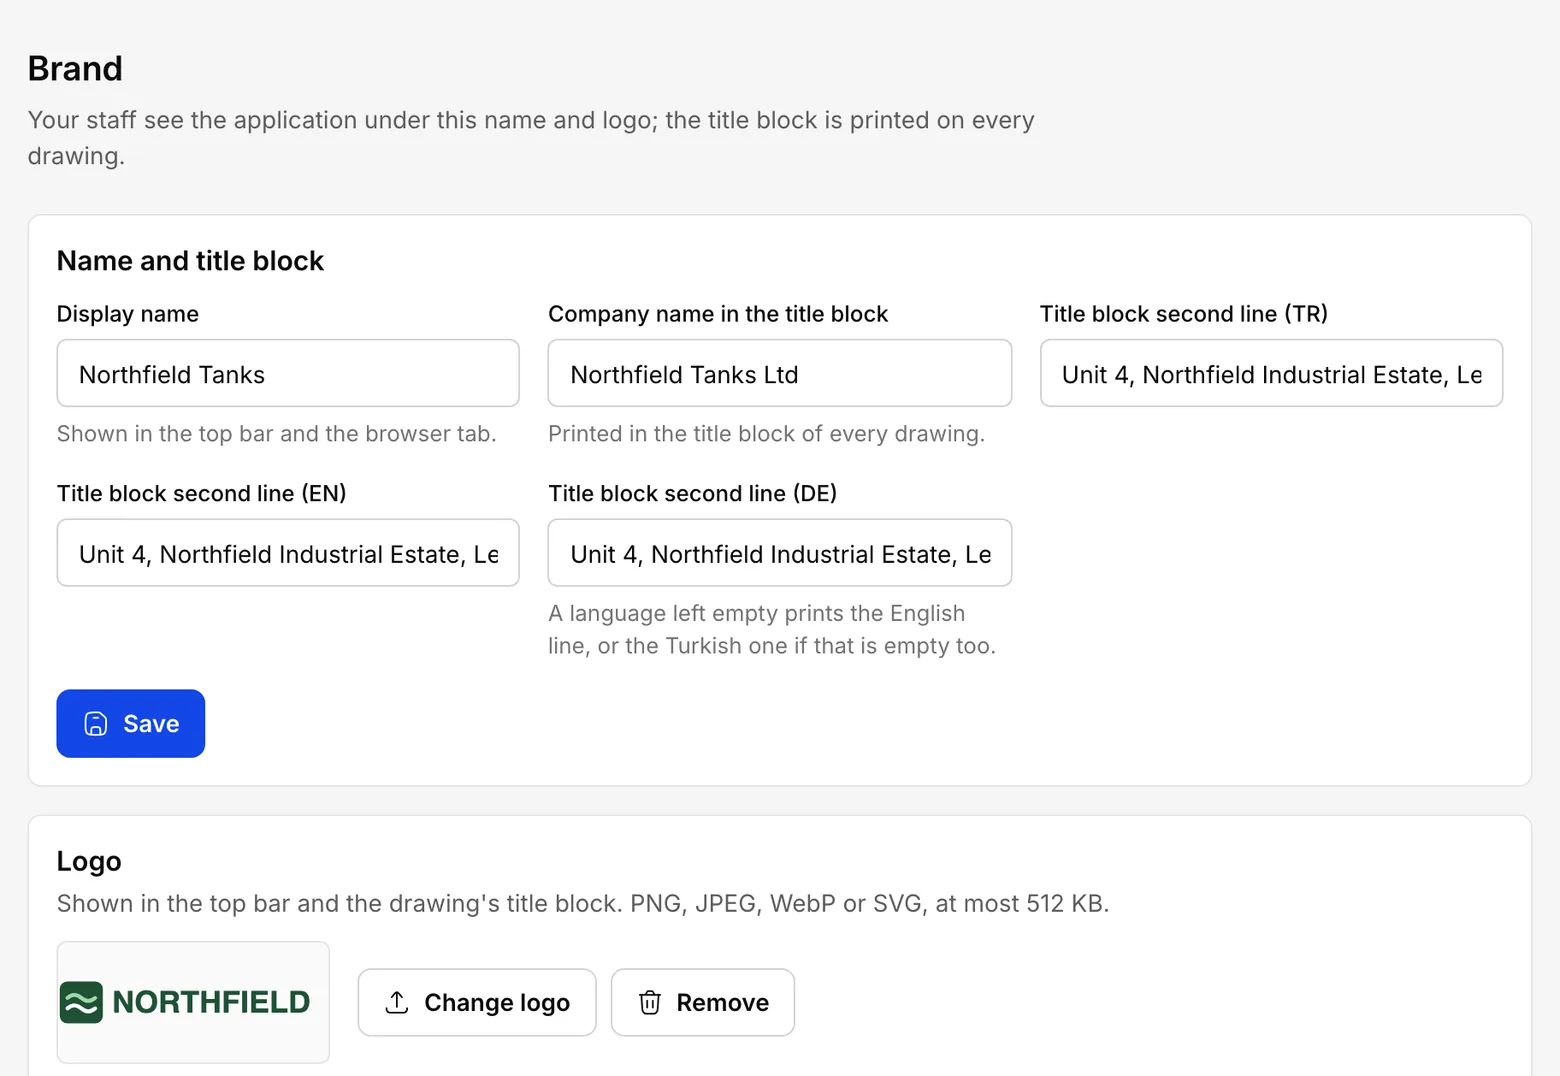
The page title says ‘Brand’. Below it are the ‘Name and title block’ and ‘Logo’ cards.
Step 2
Enter the display name and the company name for the title block.
In ‘Display name’, type the name your staff should see on the screen. It appears in the top bar and in the browser tab.
In ‘Company name in the title block’, type your company's registered name. It is printed in the title block of every drawing.
The two may be the same. If you use a short brand name and a longer registered name, enter them separately. Then press ‘Save’.
What you should see
Beside the button it says ‘Saved. It shows once you reload the application.’
Step 3
Write the title block's second line for each language.
The second line is printed under the company name in the title block. Most companies put their address or phone number there.
Each language has its own field: ‘Title block second line (TR)’ goes on Turkish drawings, ‘Title block second line (EN)’ on English ones and ‘Title block second line (DE)’ on German ones. Fill in the fields for the languages you use.
A drawing in a language whose field is empty gets the English line, or the Turkish one if that is empty too.
Then press ‘Save’ again.
What you should see
On your next PDF drawing sheet, this line appears under the company name in the title block.
Step 4
Upload your logo.
In the ‘Logo’ card, press ‘Upload logo’ and choose the logo file on your computer.
The file can be PNG, JPEG, WebP or SVG, up to 512 KB. A landscape logo on a white or transparent background works best.
The logo appears in the top bar and in the title block of the drawings. To change it later, use the ‘Change logo’ button in the same place.
What you should see
Your logo shows in the card, with ‘Logo uploaded.’ underneath.
Step 5
Choose the company language.
Open the ‘Language’ section in the list on the left. Only the company owner sees it; nobody else can change the language.
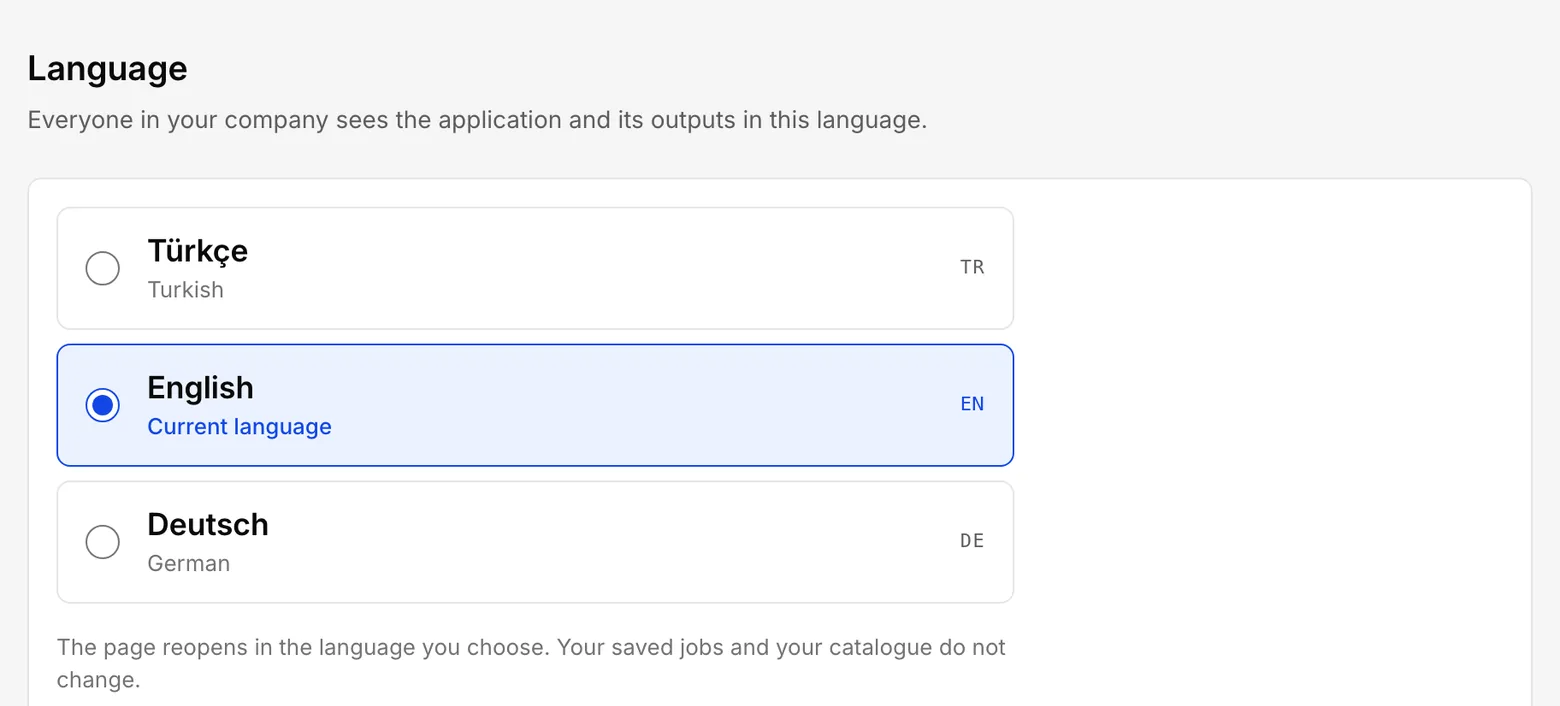
There are three choices: ‘Türkçe’, ‘English’ and ‘Deutsch’. As soon as you click one, it is saved and the page reopens in that language.
Everyone in your company then sees the application in this language, and the PDF drawing sheet, the DWG drawing and the Excel analysis come out in it too. Your saved jobs and your catalogue do not change.
If you need a single document in another language, use the small arrow beside the export button. The guide ‘Produce your first tank’ shows how.
What you should see
When the page reopens, the menus are in the language you chose and its choice is marked.
Step 6
Open accounts for your colleagues.
Open the ‘Users’ section and press ‘Add user’ at the top right. A window opens.
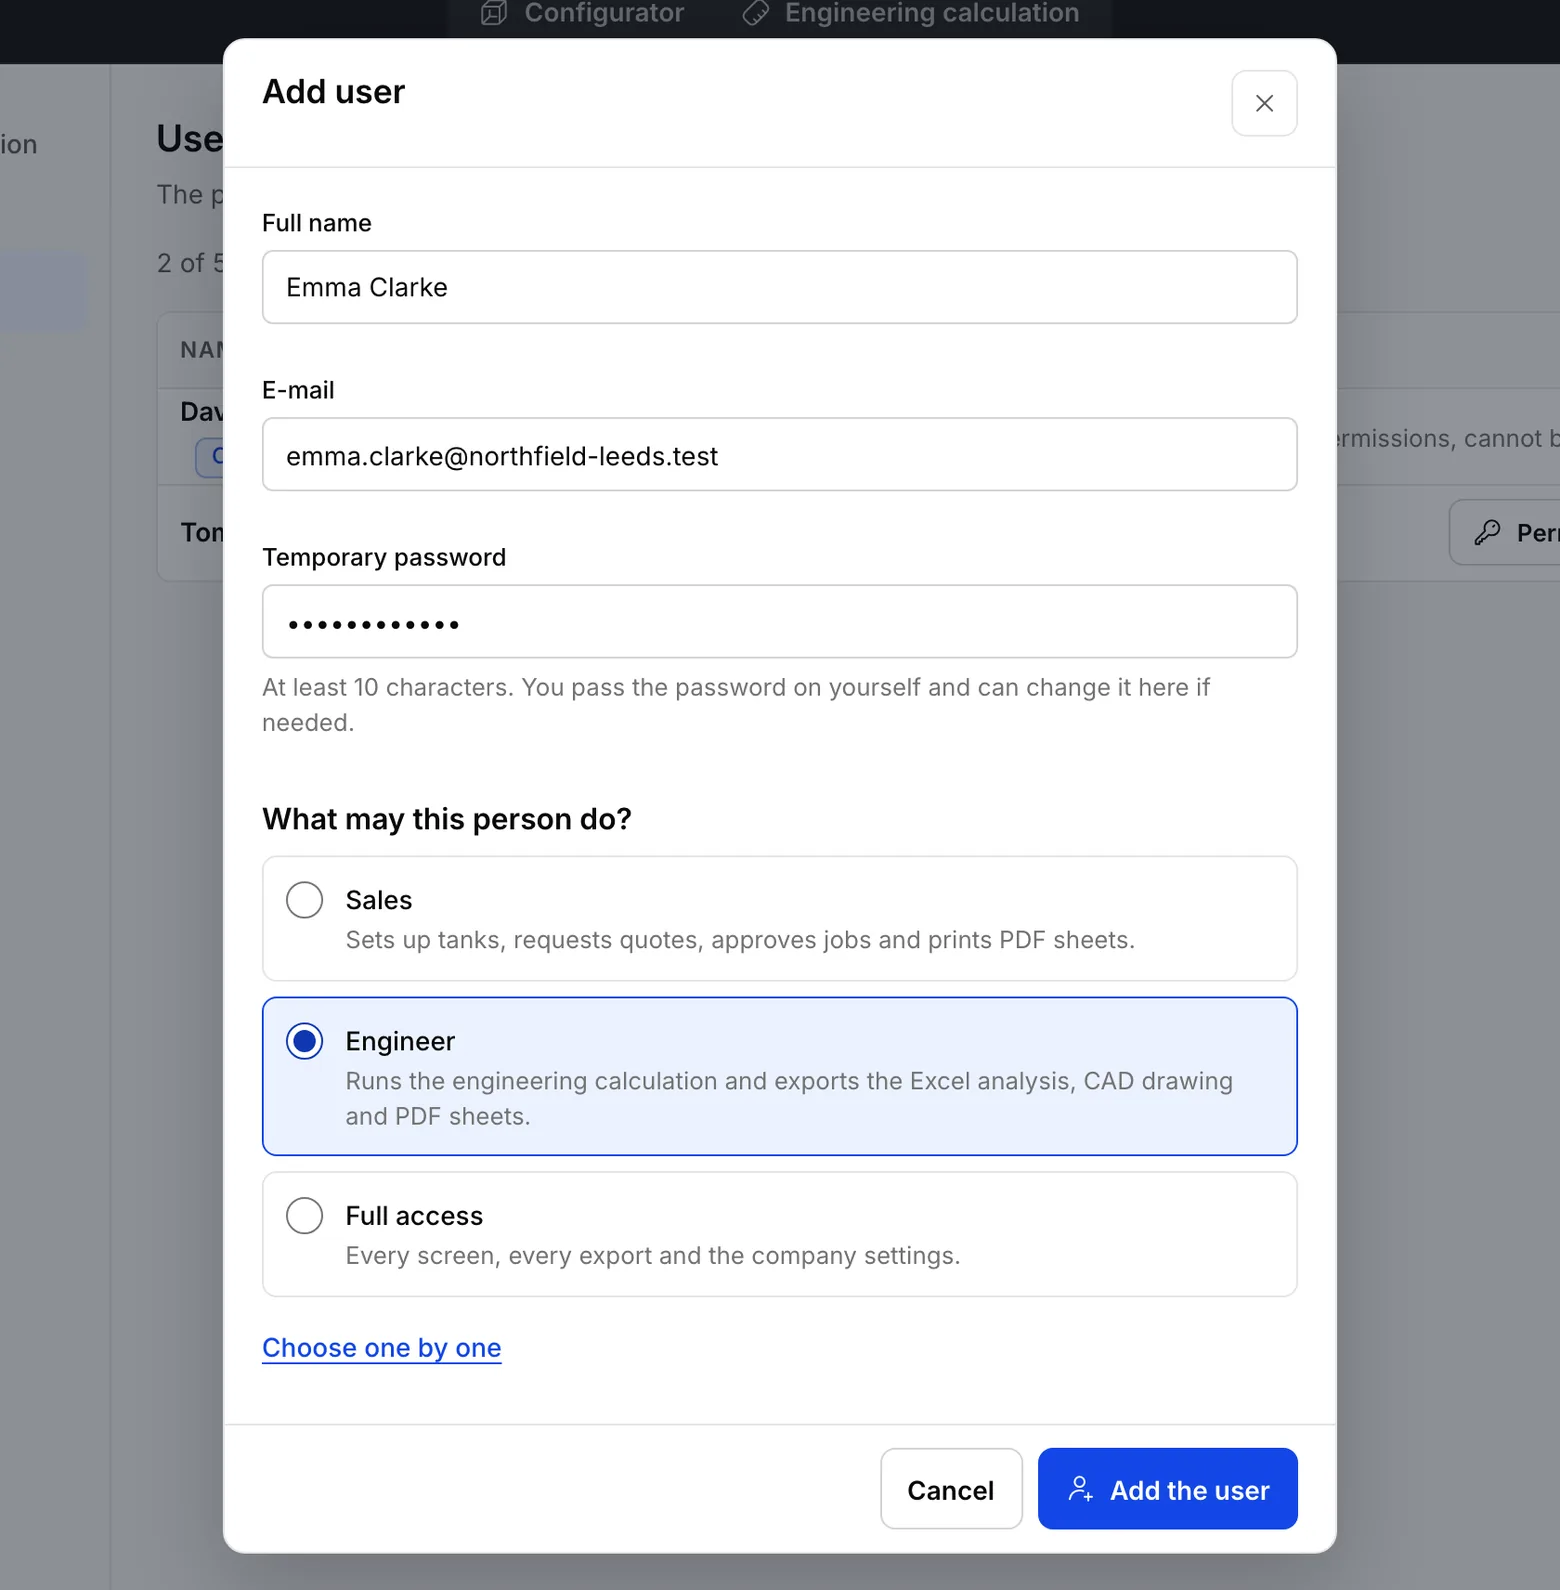
Fill in ‘Full name’ and ‘E-mail’. In ‘Temporary password’, type a password of at least 10 characters. You pass the password on to the person yourself.
Under ‘What may this person do?’ there are three ready-made roles. ‘Sales’ sets up tanks, requests quotes, approves jobs and prints PDF sheets. ‘Engineer’ runs the engineering calculation and exports the Excel analysis, the CAD drawing and PDF sheets. ‘Full access’ opens every screen, every export and the company settings.
Choose the role that fits and press ‘Add the user’.
What you should see
A notice such as ‘Emma Clarke added.’ appears at the bottom of the screen, and the person is in the list as ‘Active’.
Step 7
Choose the permissions one by one if you need to.
The ready-made roles suit most people. If someone needs a different set, press ‘Choose one by one’ in the window. Every permission opens as a tick box.
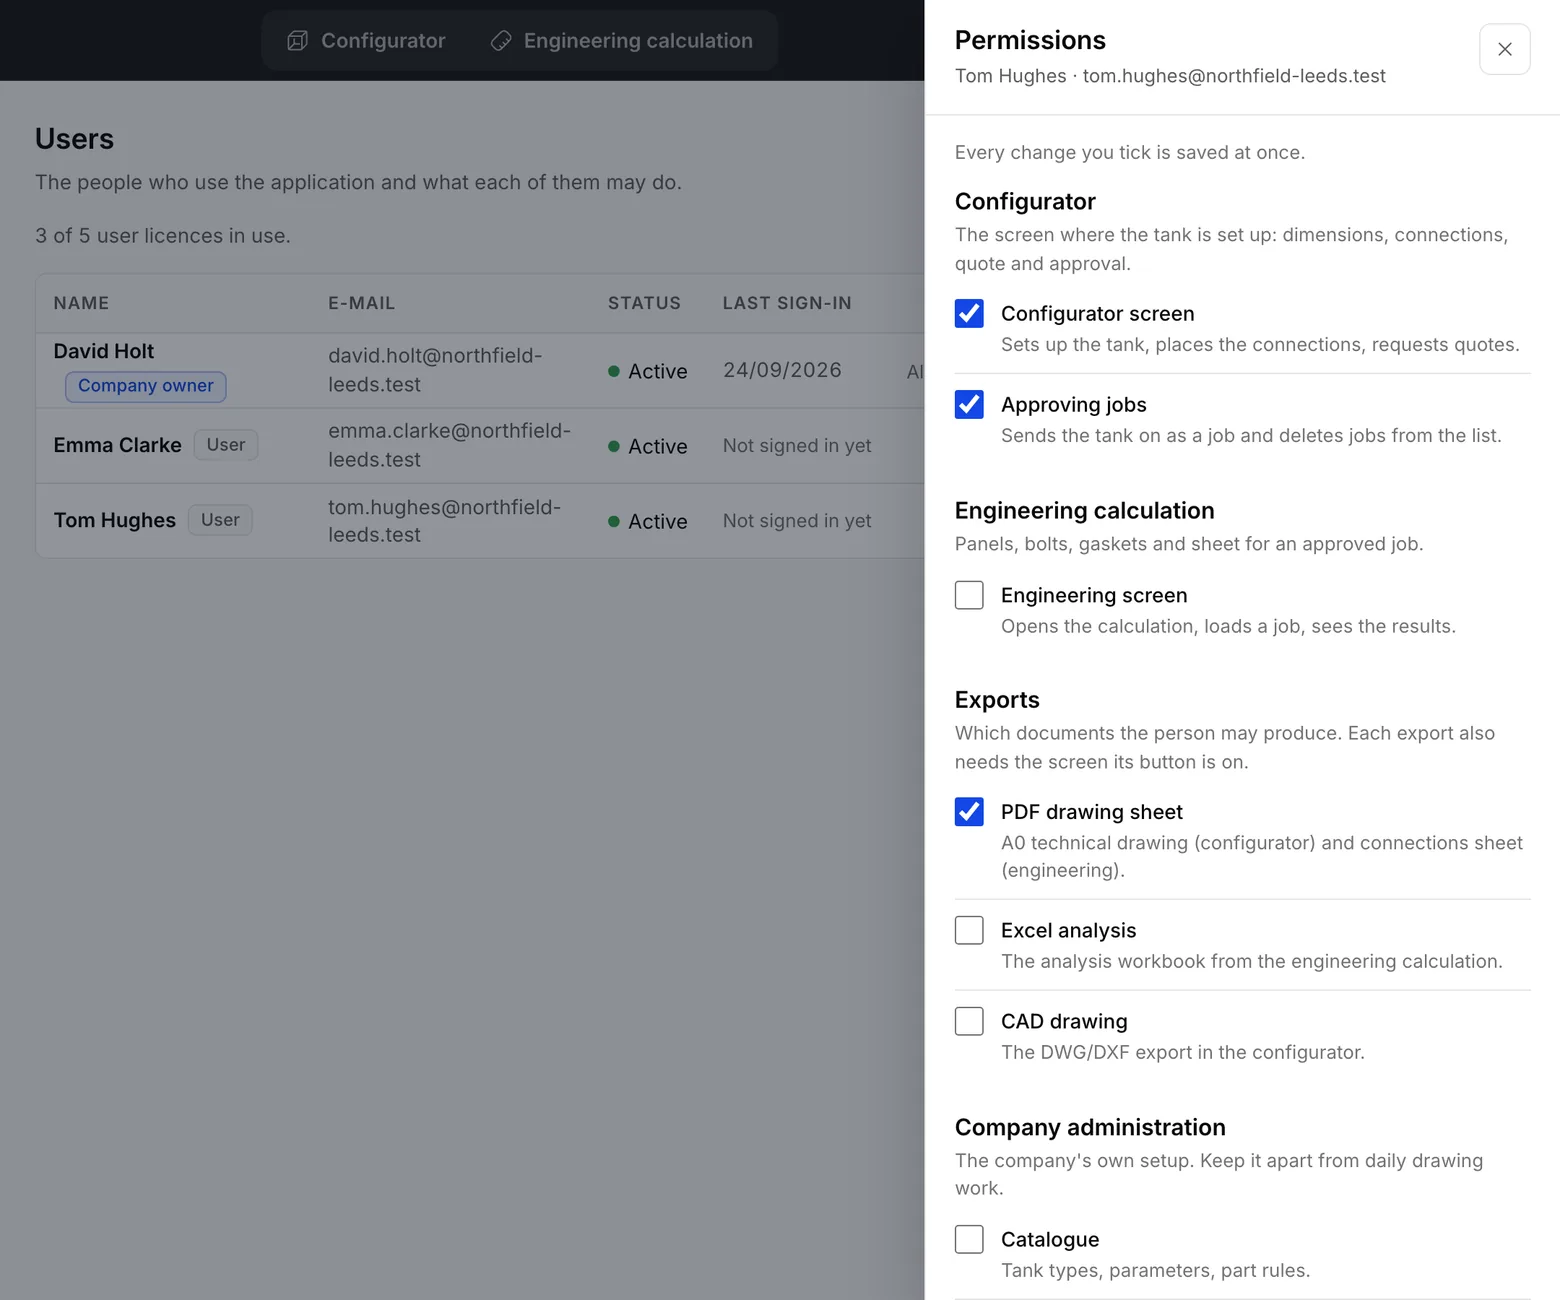
To change the permissions of an existing user, press ‘Permissions’ on that person's row in the list. The permission sheet opens.
The permissions sit under four headings: Configurator, Engineering calculation, Exports and Company administration. Every change you tick is saved at once; there is nothing else to save.
An export also needs the screen its button is on. If you switch on ‘Excel analysis’, for example, the engineering screen is switched on as well, and the sheet tells you so.
What you should see
The top of the permission sheet says ‘Every change you tick is saved at once.’
Step 8
Set a password or close an account.
If someone forgets their password, press the button with three dots at the end of their row and choose ‘Set password’. Type it in ‘New password’ and press ‘Save password’. The person uses this password at the next sign-in.
When someone leaves, their account is closed, not deleted. Choose ‘Close account’ from the same menu and confirm. The person can no longer sign in, and an open session ends at once.
You can reopen a closed account later with ‘Reopen account’ in the same menu. The company owner's row has no such menu, and the owner's permissions cannot be changed.
What you should see
The person you closed now shows as ‘Closed’.
Step 9
Check how many user licences you are using.
The line above the user list says how many user licences you have and how many are in use: for example ‘3 of 5 user licences in use.’
Closed accounts do not count. If all your licences are taken, close an account nobody uses, or write to us for more: contact@fabrikode.com
What you should see
The first number in that line is the licences in use, the second is how many you have.
Stuck somewhere? Write to us and we will try to answer the same day: contact@fabrikode.com