Step 1
Find out what WaterForm is for.
WaterForm is design software for bolted panel water tanks. You set the tank up in panels, place the connections by clicking on the model, and approve it.
The panel, bolt and gasket quantities, the A0 drawing sheet, the CAD drawing, the Excel analysis and the technical quote all come from the same model. Nothing is typed twice, so the documents never disagree.
The program runs in the browser, with nothing to install. If you prefer, the desktop application opens the same account.
Step 2
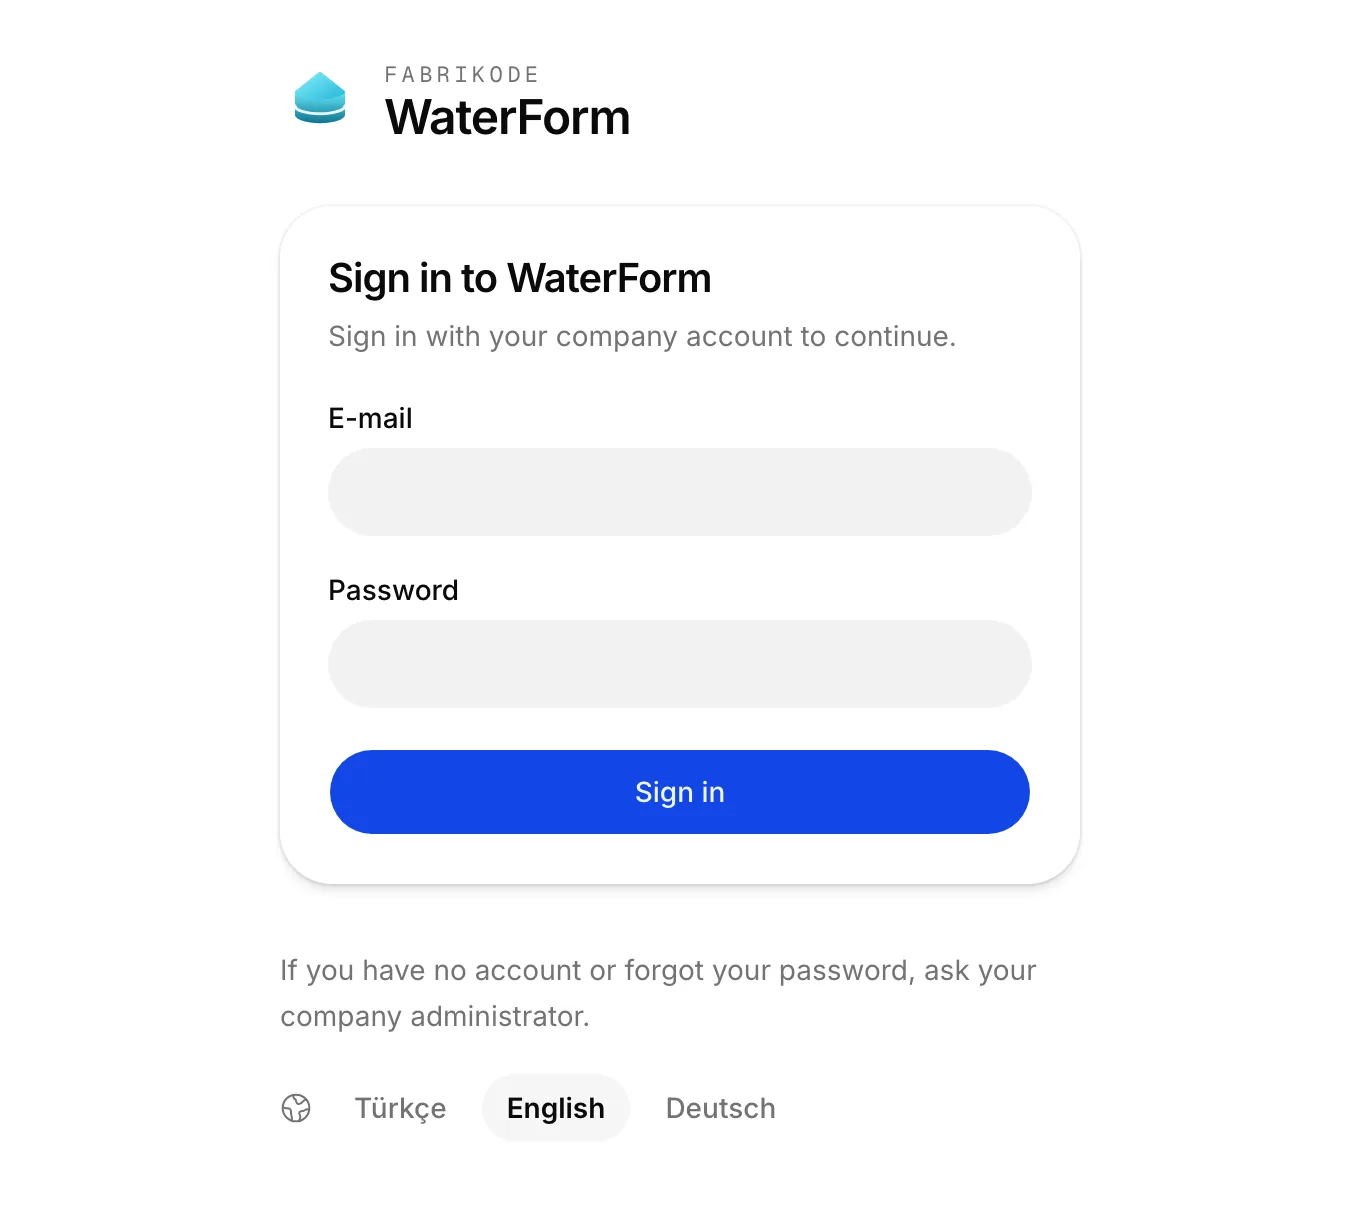
Sign in with the address you were given.
Open app.waterform.fabrikode.com in your browser. If your company runs WaterForm on its own server, use the address you were given instead.
Type the details you were sent into ‘E-mail’ and ‘Password’, then press ‘Sign in’. The language choice at the bottom of the page shows the sign-in page in Turkish, English or German.
An account stays open on one computer at a time. Signing in on another computer closes the session on the first one.
What you should see
The configurator opens. Your company's name or logo is at the left of the top bar.
Step 3
Set the tank up in the configurator and approve it.
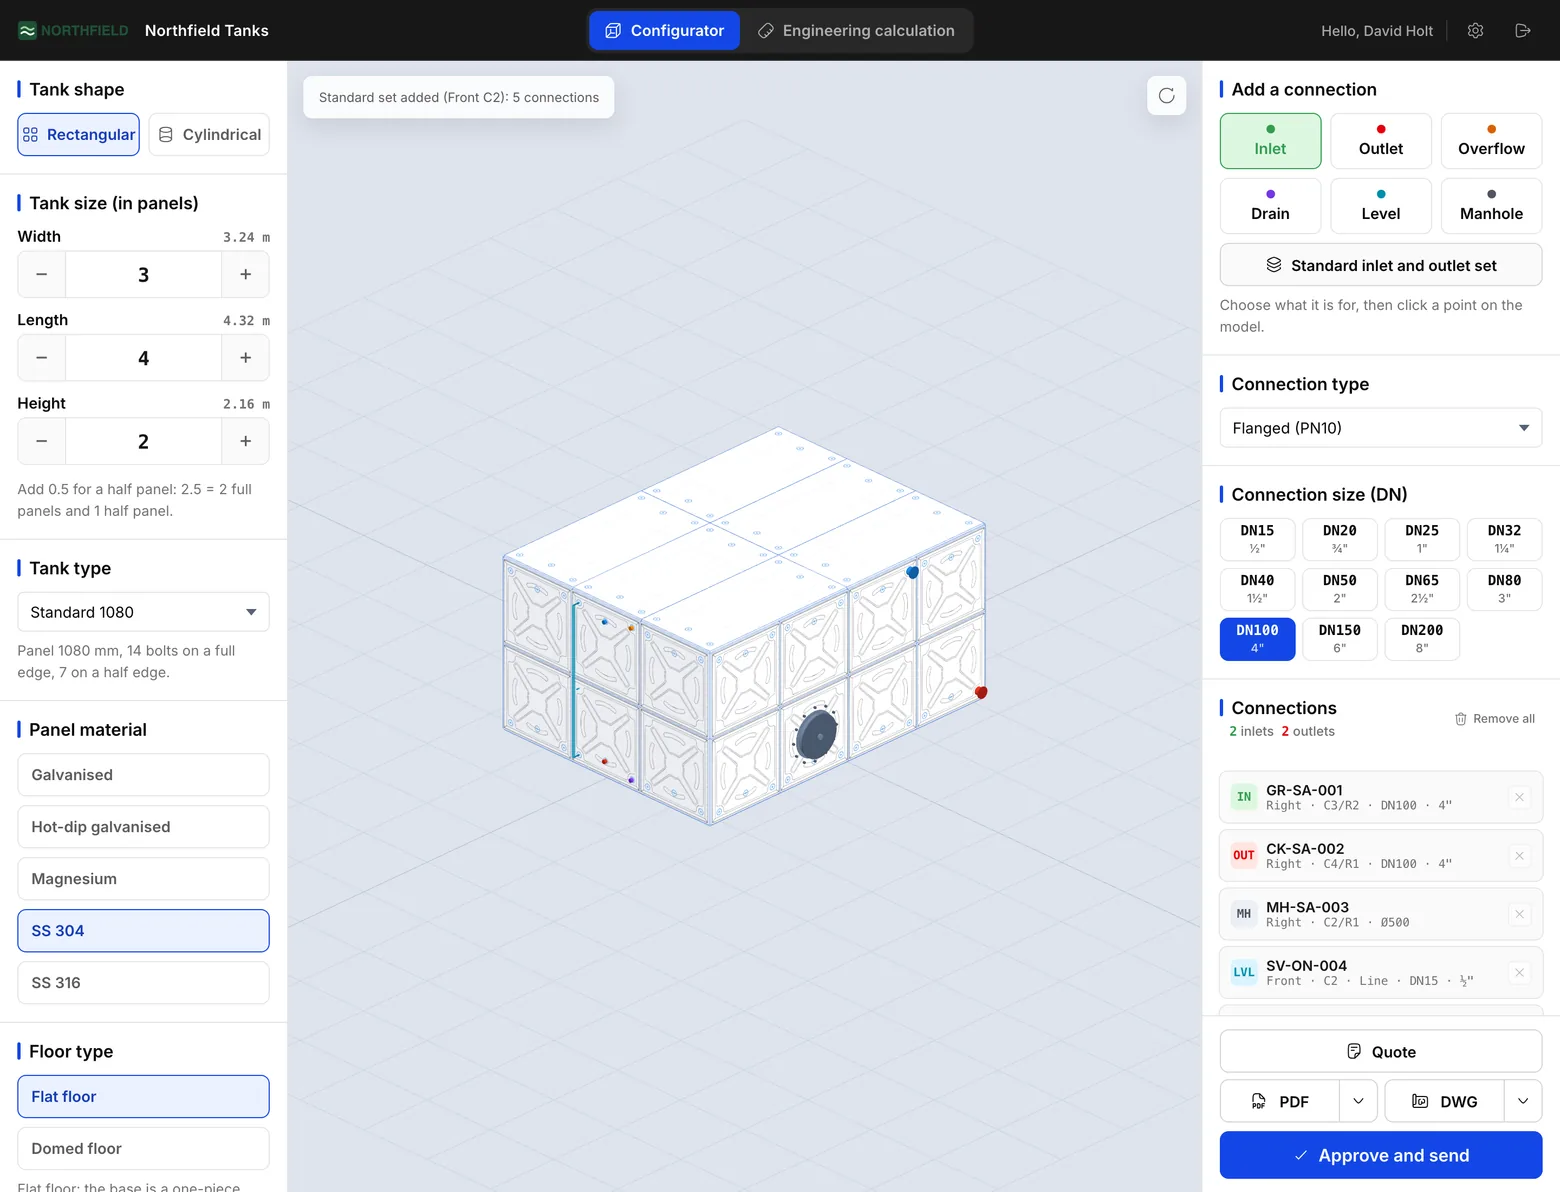
The configurator is the program's first screen. The tank settings are on the left, the tank's 3D model is in the middle and the connections are on the right.
Under ‘Tank shape’, choose ‘Rectangular’ or ‘Cylindrical’. Enter the length, width and height as panel counts; half panels are fine. When you change a dimension, the model rebuilds by itself.
You place the connections by clicking on the model. When the tank is ready, press ‘Approve and send’ at the bottom right. The tank goes to the engineering side as a job.
What you should see
After approval a short notice appears at the bottom of the screen, with the button ‘Open the engineering calculation’.
Step 4
Take the figures and the documents from the engineering calculation.
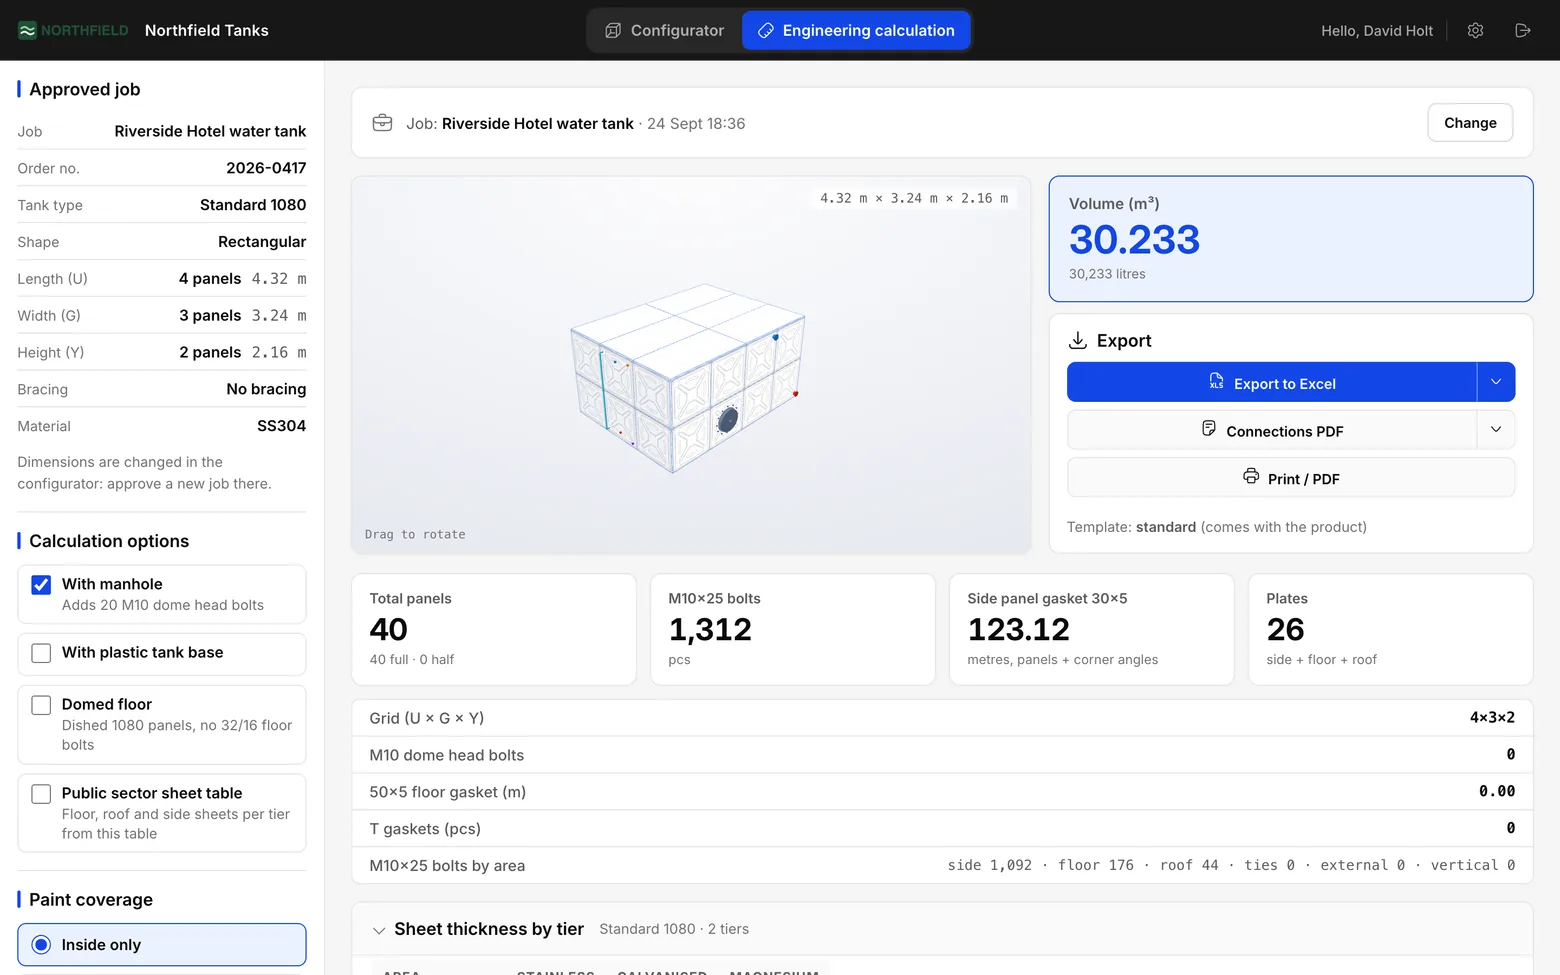
Open the ‘Engineering calculation’ tab in the top bar. The approved tanks wait here in the ‘Open jobs’ list; press ‘Open calculation’ on one.
The tank's definition comes from the approved job and cannot be changed on this screen. That way the figures always match the tank that was approved.
The panel, bolt and gasket quantities are shown here, and this is where you take the Excel analysis.
What you should see
The job you opened stays as one line at the top of the page, with the result cards underneath.
Step 5
Manage your company and your catalogue in Settings.
The gear icon at the top right opens ‘Settings’. Only users who are allowed to change settings see it.
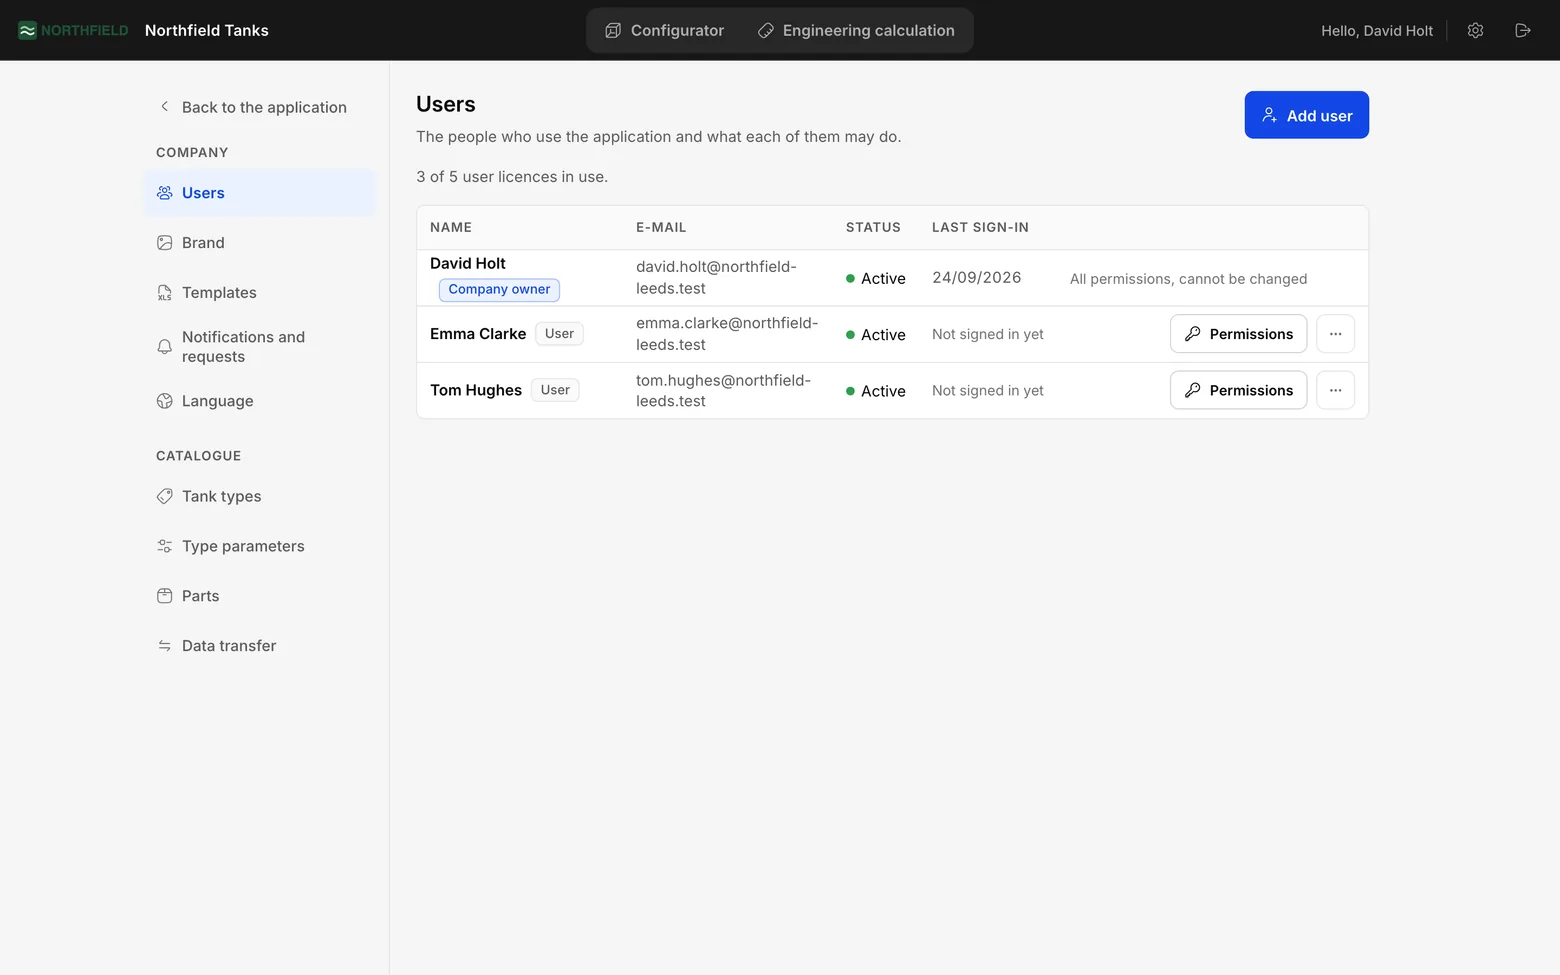
Settings has two parts. ‘Company’ holds ‘Users’, ‘Brand’, ‘Templates’, ‘Notifications and requests’ and ‘Language’. ‘Catalogue’ holds ‘Tank types’, ‘Type parameters’, ‘Parts’ and ‘Data transfer’.
Each section is shown to the people with the permission for that work; only the company owner sees ‘Language’. The ‘Back to the application’ link on the left takes you back to the configurator.
What you should see
The company owner sees nine sections on the left, and the open one's name is the page title.
Step 6
Work through the setup card.
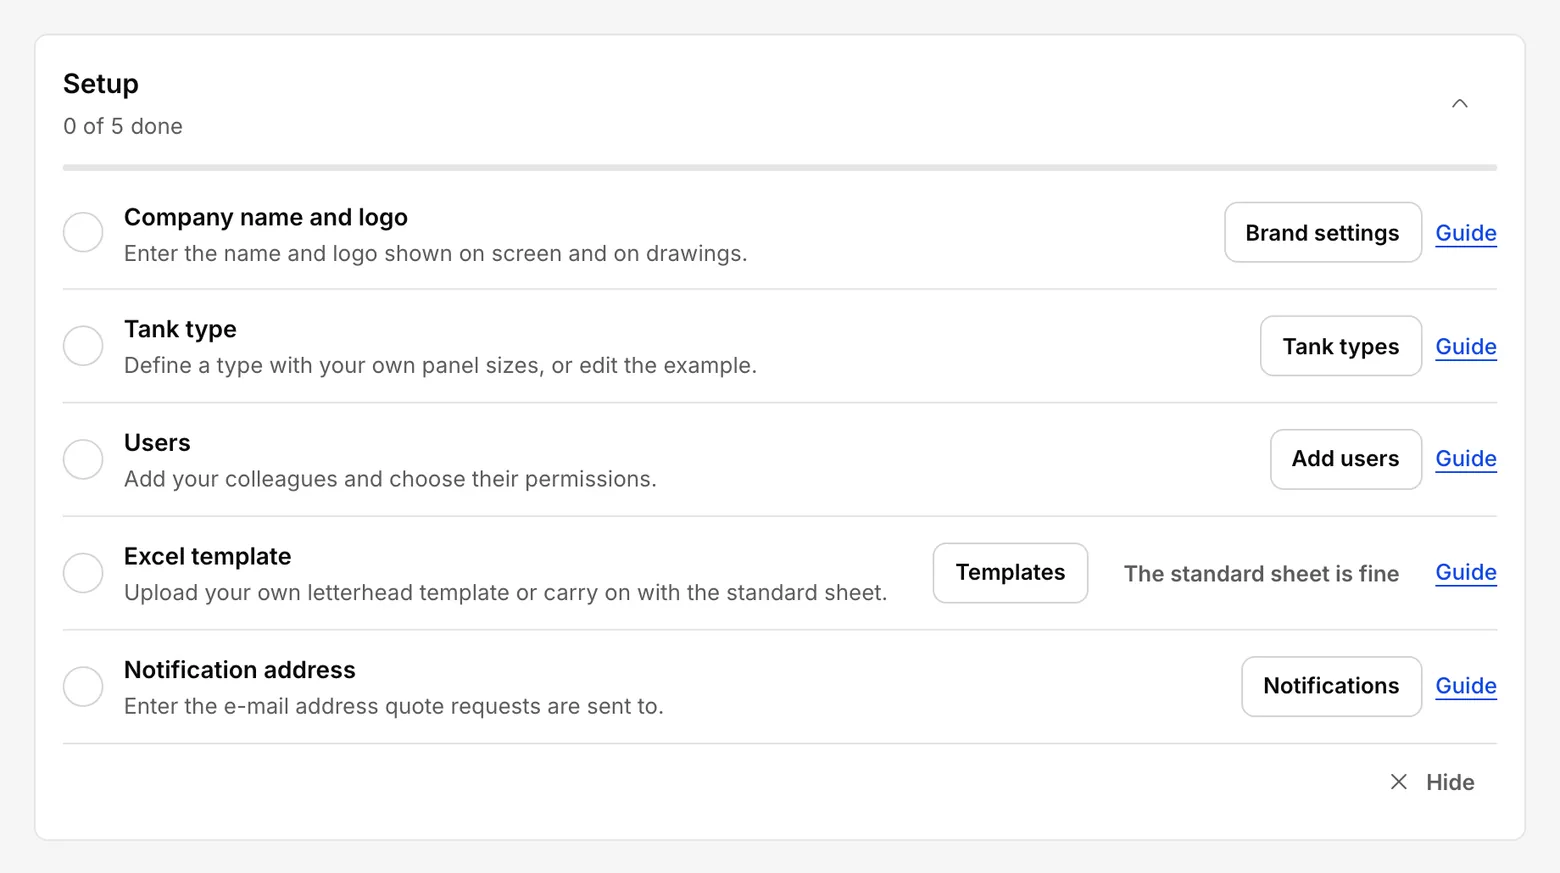
In a newly opened company with an empty catalogue, the owner, and anyone with both the ‘Catalogue’ and the ‘Users’ permission, sees a setup card at the top of Settings. While there is no tank type, the same card is in the configurator too. A company that was already working with WaterForm does not get the card.
The card has these lines: ‘Company name and logo’, ‘Tank type’, ‘Users’, ‘Excel template’ and, for companies that take quote requests, ‘Notification address’. Each line has a button to its section and a ‘Guide’ link to the guide for that job. The Excel template line also has ‘The standard sheet is fine’, to carry on with the standard sheet.
Each line is ticked as it is done. When they are all done the card goes by itself; you can also put it away earlier with ‘Hide’.
A new company starts with no tank types. The card's ‘Tank types’ button takes you to the section where you define your first one.
What you should see
A tick appears beside each line you have finished, and the count at the top of the card goes up.
Stuck somewhere? Write to us and we will try to answer the same day: contact@fabrikode.com