Step 1
Open the ‘Type parameters’ section.
In Settings, click ‘Type parameters’ under ‘Catalogue’ in the list on the left. People with the ‘Catalogue’ permission see this section.
This page holds every measurement and table of a tank type that the calculation uses. Come here when you want to change a value after the type has been defined.
What you should see
The ‘Type being edited’ choice is at the top, with the tabs underneath.
Step 2
Choose the type in ‘Type being edited’.
In the ‘Type being edited’ list at the top of the page, choose the type you want to change. Every tab below shows that type's values.
This choice does a second job: the configurator opens with this type too. The type you choose here is the one your colleagues see first in the configurator.
If you try to switch to another type with unsaved changes, the program asks. With ‘Switch without saving’ the changes are lost.
Step 3
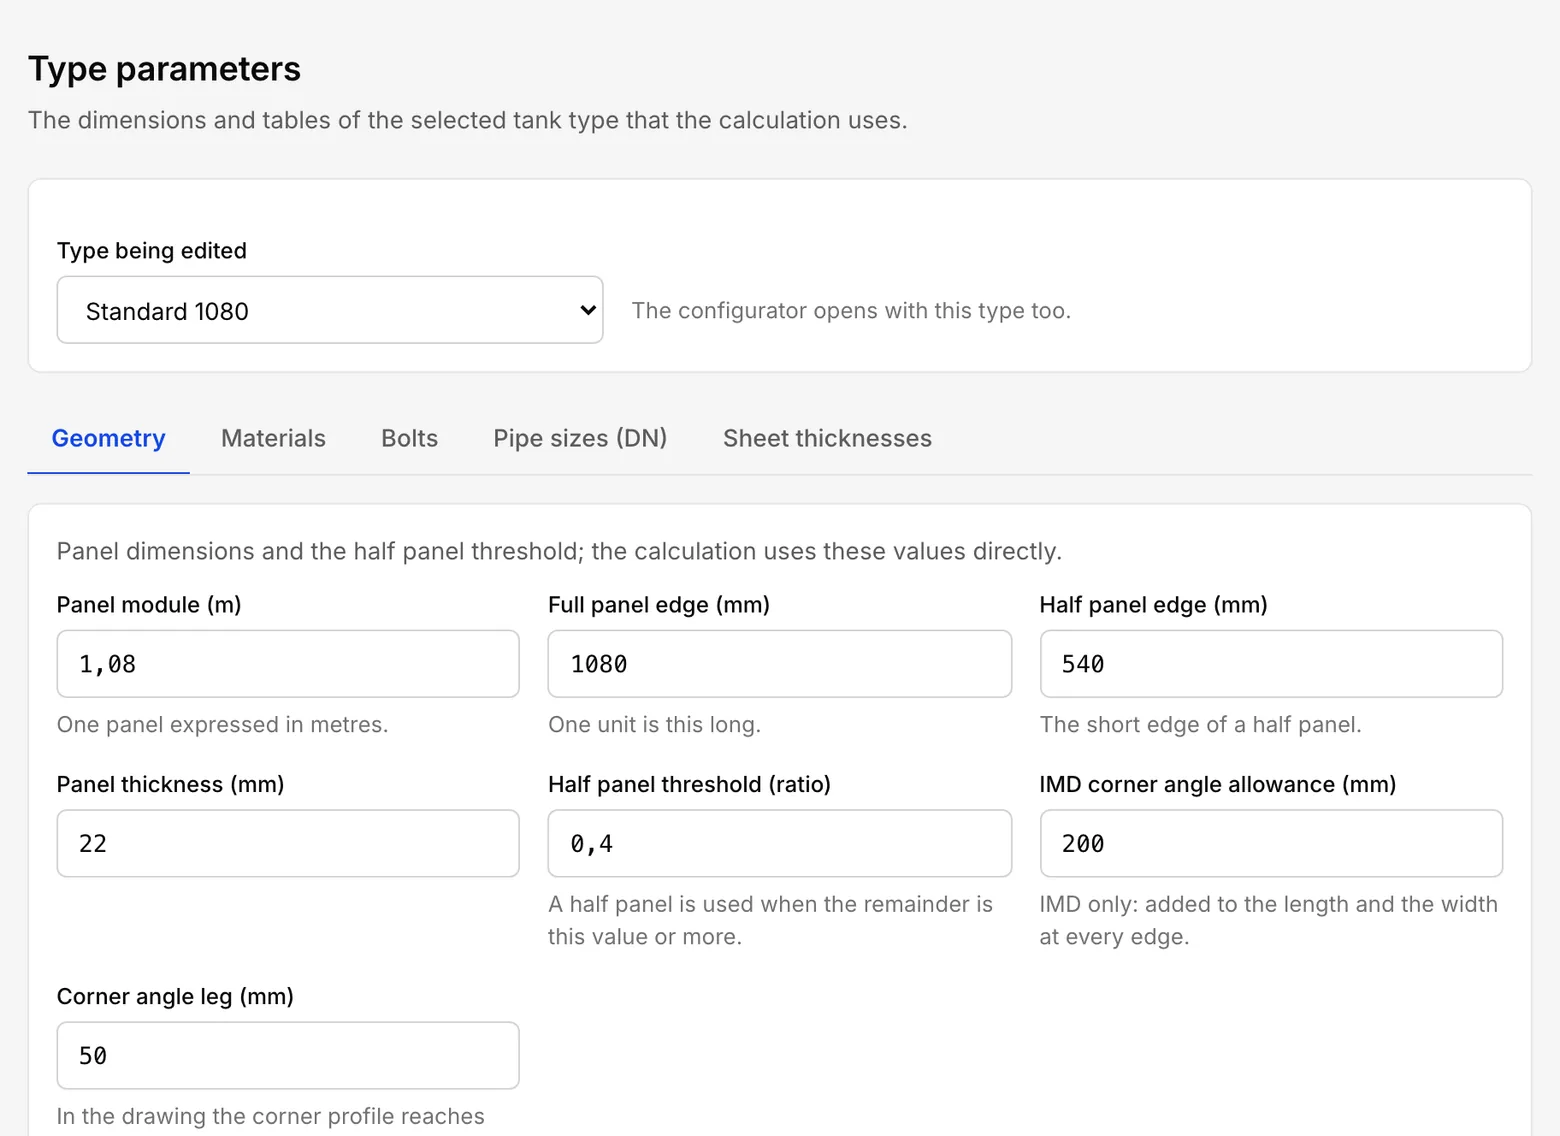
Correct the panel measurements on the ‘Geometry’ tab.
‘Panel module’ is one panel in metres. The tank's dimensions are turned into metres with it, and the volume, the dimensions on the drawings and the sizes in the quote rest on it.
‘Full panel edge’ and ‘Half panel edge’ are the panel lengths in millimetres. The drawings and the plate layout are made with them. ‘Panel thickness’ is in millimetres too.
‘Half panel threshold’: a half panel is used when the remainder of a dimension is this value or more. Change it and the number of full and half panels changes on some tanks.
‘Corner angle leg’ is how far the corner profile reaches beyond each side in the drawing.
Step 4
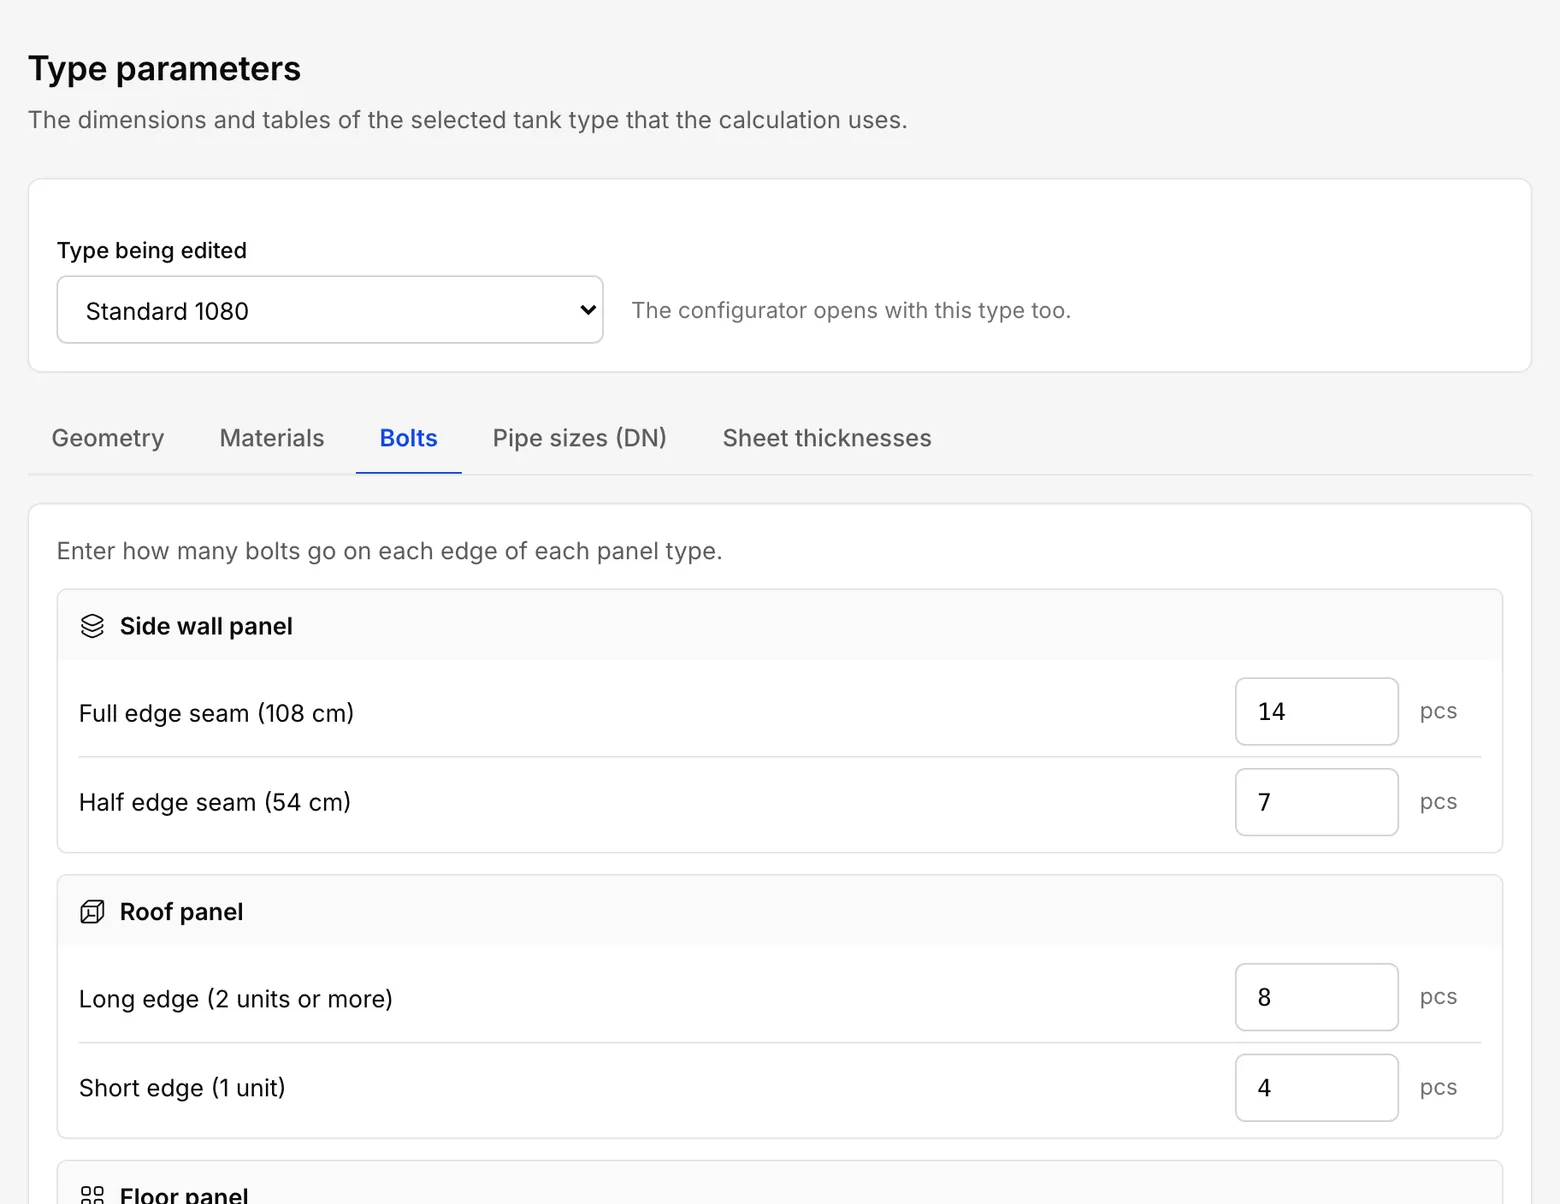
Enter the bolts per edge on the ‘Bolts’ tab.
The tab has three groups: ‘Side wall panel’, ‘Roof panel’ and ‘Floor panel’.
The side wall panel has two values: ‘Full edge seam (108 cm)’ and ‘Half edge seam (54 cm)’. The roof and floor panels have two as well: ‘Long edge (2 units or more)’ and ‘Short edge (1 unit)’.
These numbers directly set the bolt count of the side wall seams and of the roof and floor joints. Change one and the total bolt count in the engineering calculation changes with it.
Step 5
Edit the connection sizes on the ‘Pipe sizes (DN)’ tab.
Each row is one connection size: the DN name and the ‘Radius (mm)’ the configurator draws.
The configurator's ‘Connection size (DN)’ list comes from this table. For a new size, type the DN name and the radius in the row at the bottom and press ‘Add row’.
This table decides how connections look on the model and the drawing. It does not change the panel, bolt or gasket counts.
Step 6
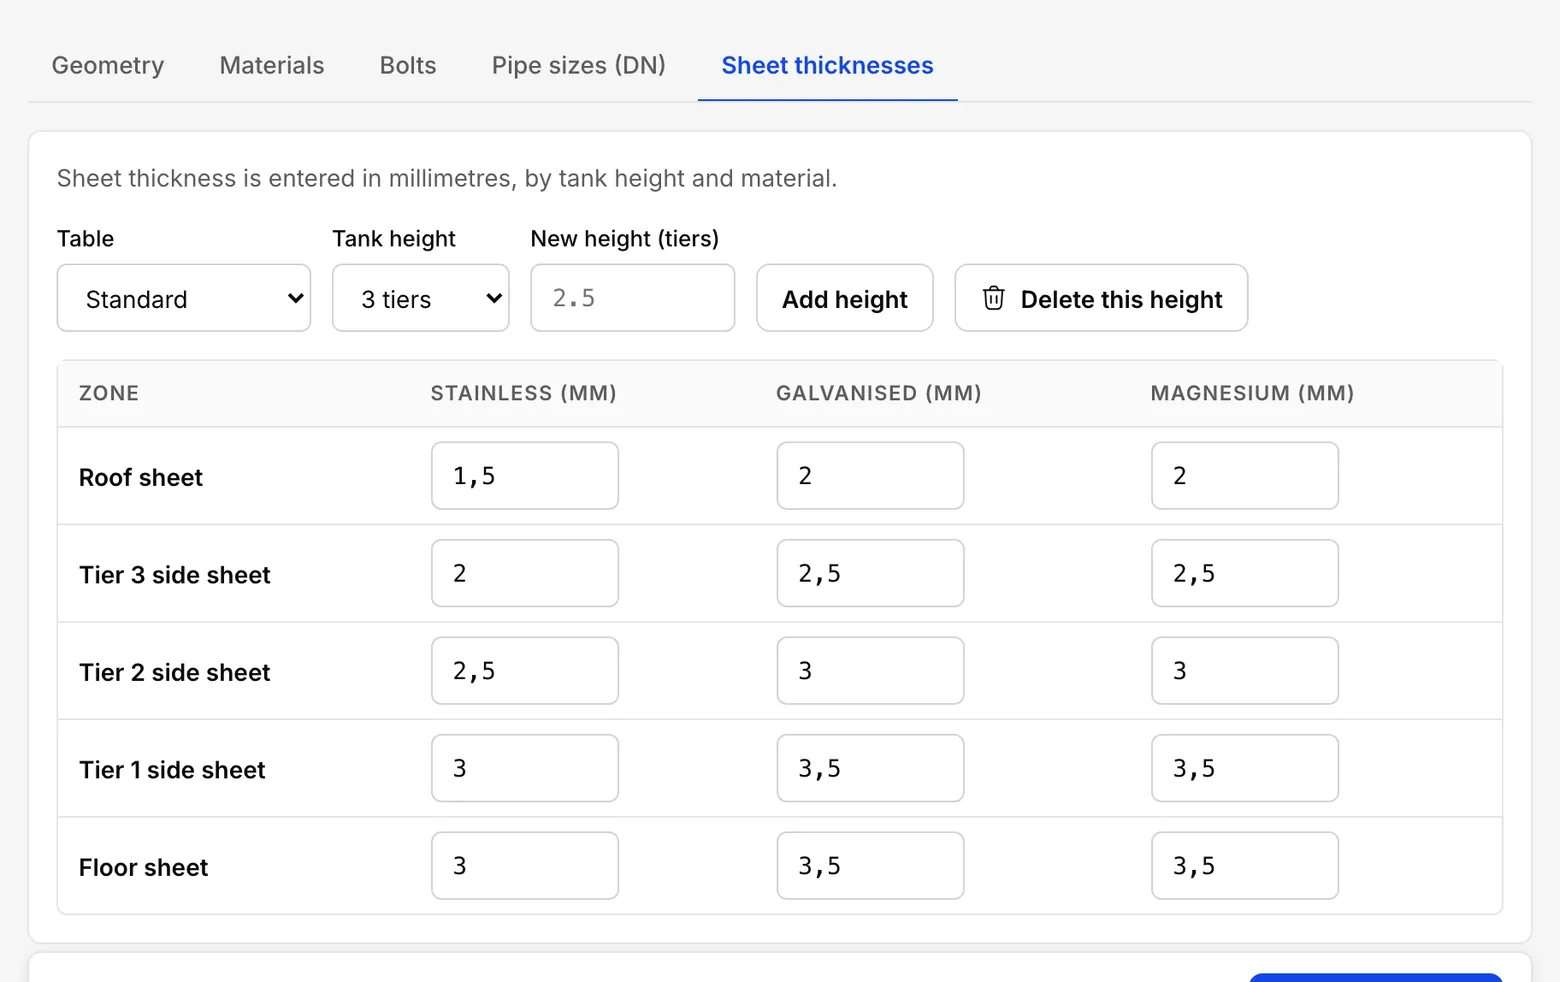
Fill in the table on the ‘Sheet thicknesses’ tab.
Sheet thickness is entered in millimetres, by tank height and material. Choose the ‘Tank height’ first. Then enter the thickness of the floor sheet, each tier's side sheet and the roof sheet in each column: ‘Stainless (mm)’, ‘Galvanised (mm)’ and ‘Magnesium (mm)’. Tier 1 is the bottom row.
A height with a half panel, such as 2.5, is added as a height of its own with ‘Add height’.
The calculation uses the rows of the greatest height that does not exceed the tank's height. Some types have separate tables in the ‘Table’ choice at the top, such as ‘Public sector’. When the ‘Public sector sheet table’ is switched on in the engineering calculation, the thicknesses are read from it.
This table sets the sheet thicknesses shown in the engineering calculation.
Step 7
Manage the type's materials on the ‘Materials’ tab.
This tab lists the type's panel materials in a table headed ‘Material’ and ‘Sheet column’. The configurator's ‘Panel material’ list comes from here.
Each material uses one column of the sheet thickness table: stainless, galvanised or magnesium. The calculation reads that material's sheet thickness from that column. The standard materials keep their column; for a material you added yourself you change it in the list on its row.
For a new material, type its name in ‘Material name’, choose the column in ‘Sheet column used in the calculation’ and press ‘Add’. Remove one you do not use with the bin icon at the end of its row; at least one must remain. A standard material you removed comes back through ‘Add a standard material back’.
Changes on this tab are saved with the save bar at the bottom of the page too.
Step 8
Know the different tabs of cylindrical and GRP types.
When you choose a cylindrical type, a ‘Series’ tab appears. It holds bolted sheet series such as CS10 to CS50. Each series has a ‘Sheet height (mm)’, ‘Sheet width (mm)’, ‘Overlap (mm)’, ‘First code’ and ‘Last code’. The last two digits of a code are the number of panels around the tank. The configurator's series and code lists come from this table.
When you choose a GRP type, tabs of its own appear. ‘Tank variant’ holds the corner angle, floor and roof options; ‘Panel types’ holds the weight, bolts and gaskets of the 1 m, 1.5 m and 2 m panels. On ‘Panel weights’ you enter a weight for each panel stack instead of a sheet thickness. ‘Stiffeners’ holds the flat bars and the external stiffener.
Step 9
Save the changes with one button.
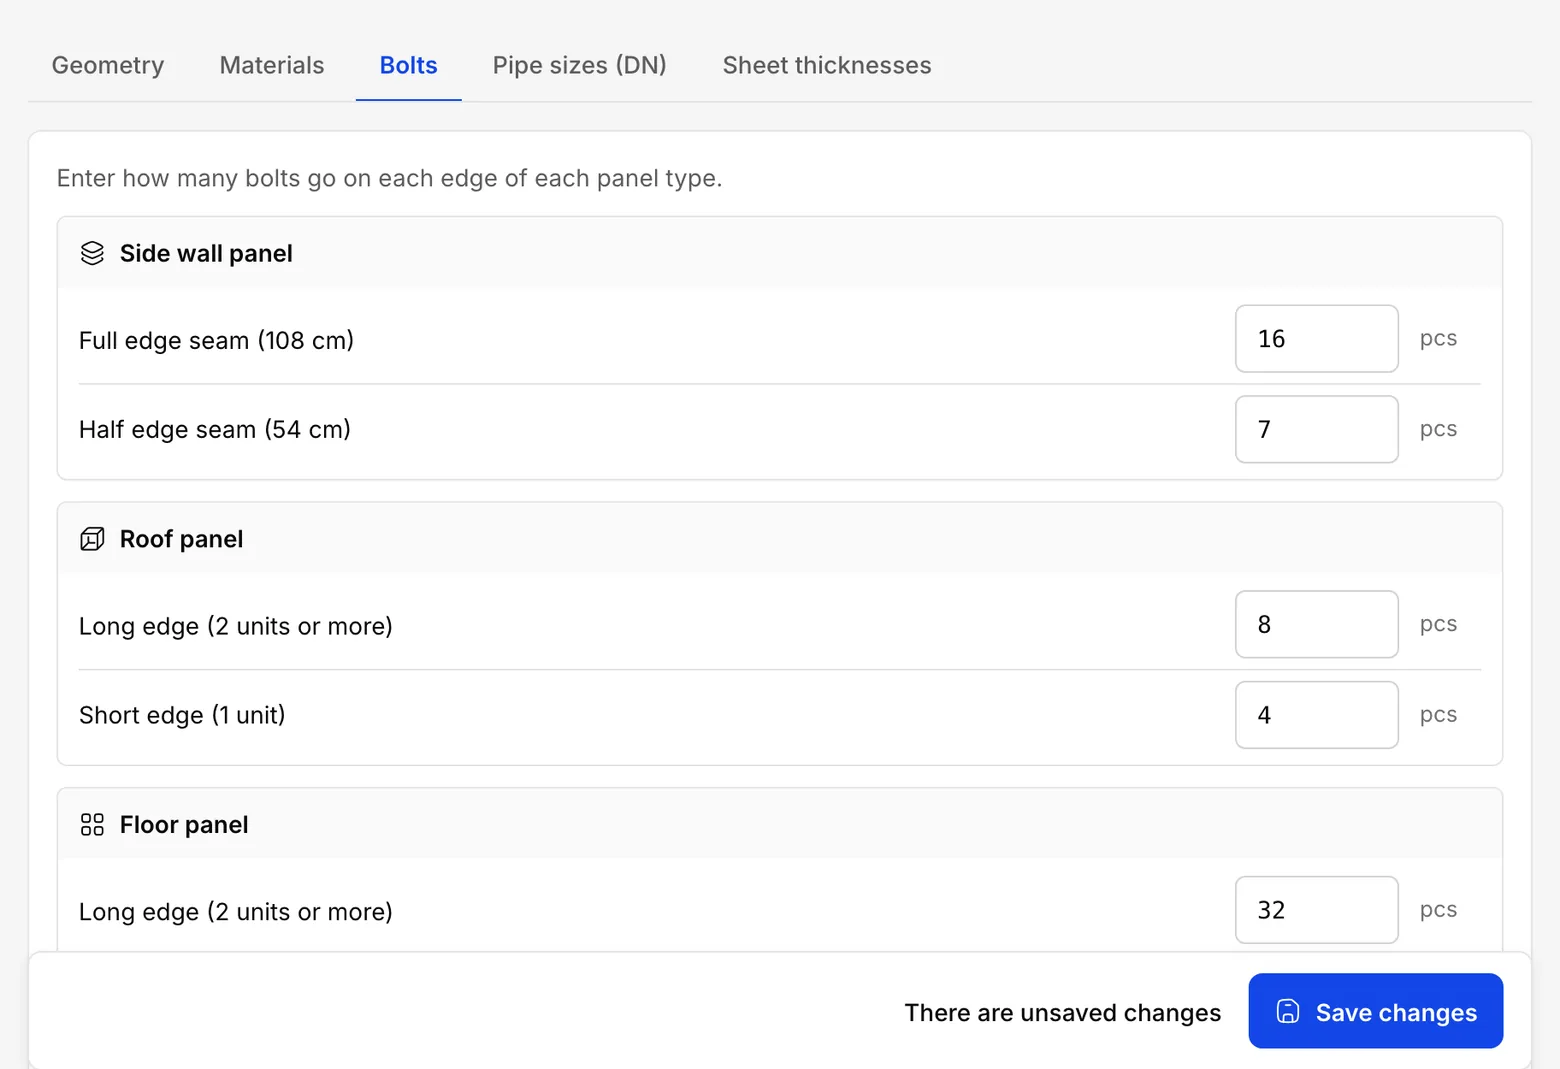
The save bar at the bottom of the page serves every tab. When you change a value, the bar says ‘There are unsaved changes’.
Press ‘Save changes’. Unsaved changes on other tabs are saved with it.
What you should see
The bar says ‘Saved’.
Step 10
Go back to the defaults if you need to.
At the bottom of the ‘Geometry’ tab is ‘Reset all parameters to the defaults’. The program asks first; with ‘Reset’ every value goes back to its default.
The defaults are the example panel's values, so the values you entered for your own panel go too. Use it only when you want to start again from scratch.
Step 11
After a change, check it against a tank you know.
The parameters affect every calculation. After changing a value, calculate again a tank whose panel, bolt and gasket counts you know for certain, such as one you have already built.
Set that tank up in the configurator with the same dimensions, approve the job, and compare the engineering calculation with the numbers you know.
If the numbers do not match, undo the change or write to us: contact@fabrikode.com. A wrong parameter puts a wrong number in every quote until somebody notices.
What you should see
The engineering calculation shows the numbers you know.
Stuck somewhere? Write to us and we will try to answer the same day: contact@fabrikode.com